This post may contain affiliate links. As a Sheet Music Plus and Amazon Associate, I earn from qualifying purchases. That means I make a small commission (at no additional cost to you) if you purchase something from an affiliate link.
I created a holiday playlist of students as a gift to parents this year. In this post, you can learn how to create a playlist on YouTube using Apple voice memos. It is an easy project that you can do! It shows students’ progress, and it’s something that can be enjoyed by friends and relatives also. (Due to the COVID-19 pandemic, it’s also a great way to showcase students without a public recital.)
To create a holiday playlist of my students, I used audio rather than video. I prefer not to post pictures and videos of my students online. So just using audio allows me to respect the privacy of children. Some children also don’t like to be videoed! In the end, I actually preferred having just the audio recordings. I noticed that students enjoyed listening to how they sounded, rather than just watching. The students were all very proud of how they sounded.
If you’d like to know more about how to move an Apple voice memo to YouTube, read on.

To create a YouTube playlist from Apple voice memos, you’ll need four apps on your Apple device:
Follow these steps to move a voice memo to YouTube:
- Use the Voice Memos app to record students.
I am happy with the sound of the recordings from my iPhone. If you have an older iPhone or iPad, you may want to look into getting a better microphone that is compatible with your device.
I really like the Blue Yeti Nano microphone. You’ll also need a USB/lightning adapter to use it with your iPhone. - Use Canva to create an image for the recording.
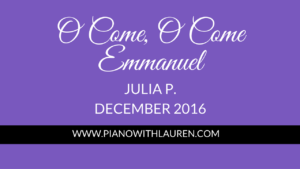
I made an image using Canva (you can use any other design app) to display during the audio recording.
After you create the image, be sure to save it to your device. Here is a sample of what I included for each student’s recording:
- Use iMovie to combine the image and voice memo.
- Go the Voice Memos app and select the recording that you’d like to use. Tap the “share” icon. Then select “Copy to iMovie.” In this step, you may have to tap the “…” option if you don’t see an option for iMovie. Once you tap “…”, scroll down under “Suggestions.” You should see “Copy to iMovie.”
- Once you select “Copy to iMovie,” iMovie will open. Select “Create New Movie.”
- Now in the “Media” menu, you can select to add the photo you created from Canva to the project.
- Once the photo is added to the recording, iMovie automatically adjusts the recording length to 7.5 seconds. Don’t worry! iMovie didn’t delete the recording. All you will need to do is tap the photo and drag to the right to lengthen the movie.
- Once the voice memo and picture are combined, you can then edit the length of the recording and adjust the image.
- Select “Done” after you’ve edited the movie.
- Go the Voice Memos app and select the recording that you’d like to use. Tap the “share” icon. Then select “Copy to iMovie.” In this step, you may have to tap the “…” option if you don’t see an option for iMovie. Once you tap “…”, scroll down under “Suggestions.” You should see “Copy to iMovie.”
- Upload the recording to YouTube.
Now that the voice memo is a movie and compatible with YouTube, you can select the share icon on the project in iMovie. Then select “YouTube” to upload the movie to Youtube. - Create a playlist in YouTube.
Once the recording is uploaded, you can create edit the title and description. You can also create a new playlist in your YouTube account and add the video to it.
Doing this for the first time, does take some time. After you complete one recording, it does it get easier! To complete the project, I uploaded a few recordings at the end of each teaching day. By the end of the week, I had a really nice playlist to share with families.
Check out my studio playlist here.

Lauren teaches piano to students of all ages. She enjoys creating resources for her students and teachers. She is the author of Ready for Theory®. For personalized help, check out the consultations page for teachers.